


Wedding Hair Tutorial The Fishbone Braid
To be honest, this style looks even better when slept in it for a night or two. It’s supposed to be a bit wild and messy, but you can easily create that look from the get-go. Here’s how to do the fishbone braid.
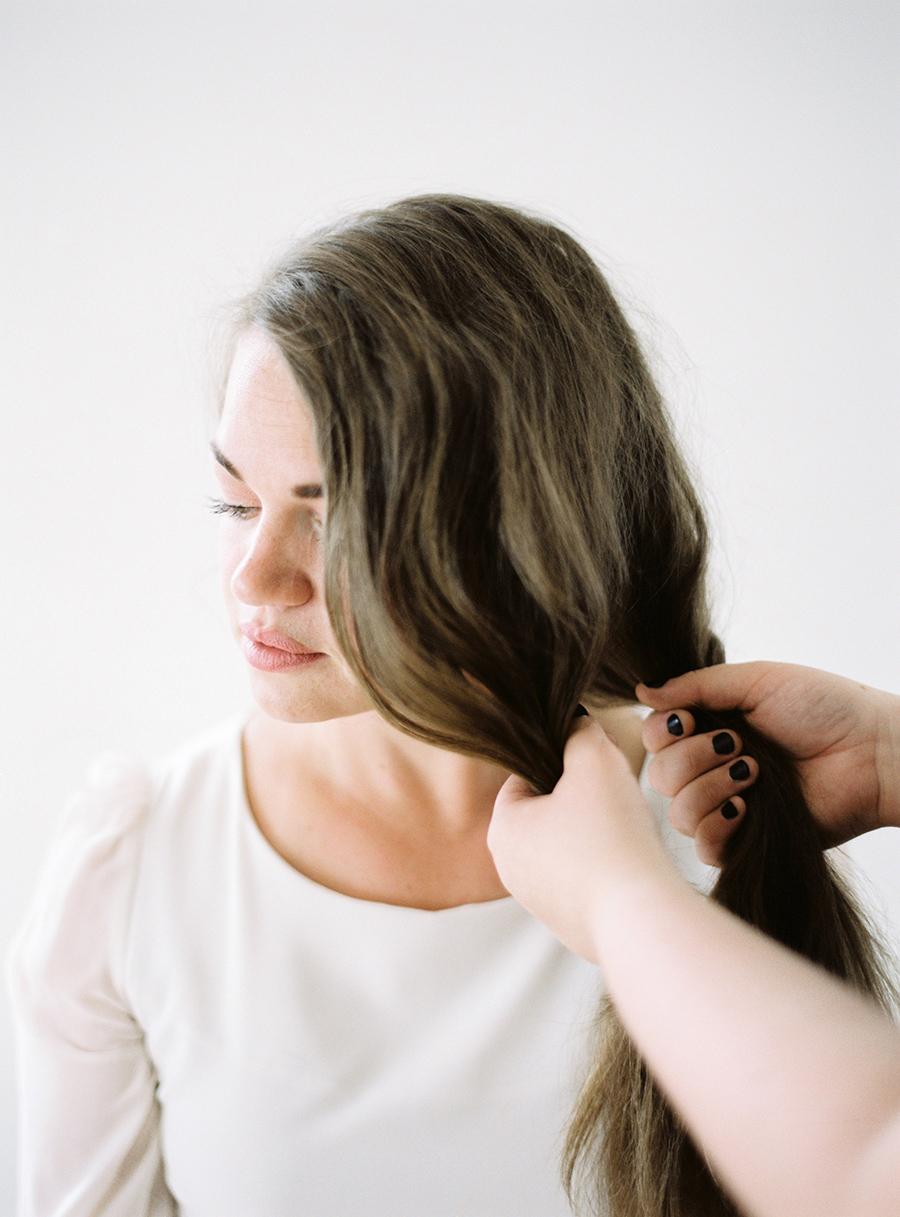
Brush your hair. Especially if you like me have wavy or curly hair. Then you need to divide all of your hair into a side parting and take the whole length of it over to one side.
Then you split it into two sections. Take a small strand of hair from the outside of one of the two main sections and bring it to the inside of the opposite section. Next, take a small piece of hair from the outside of the other section and bring it to the inside of the opposite section and pull tight.
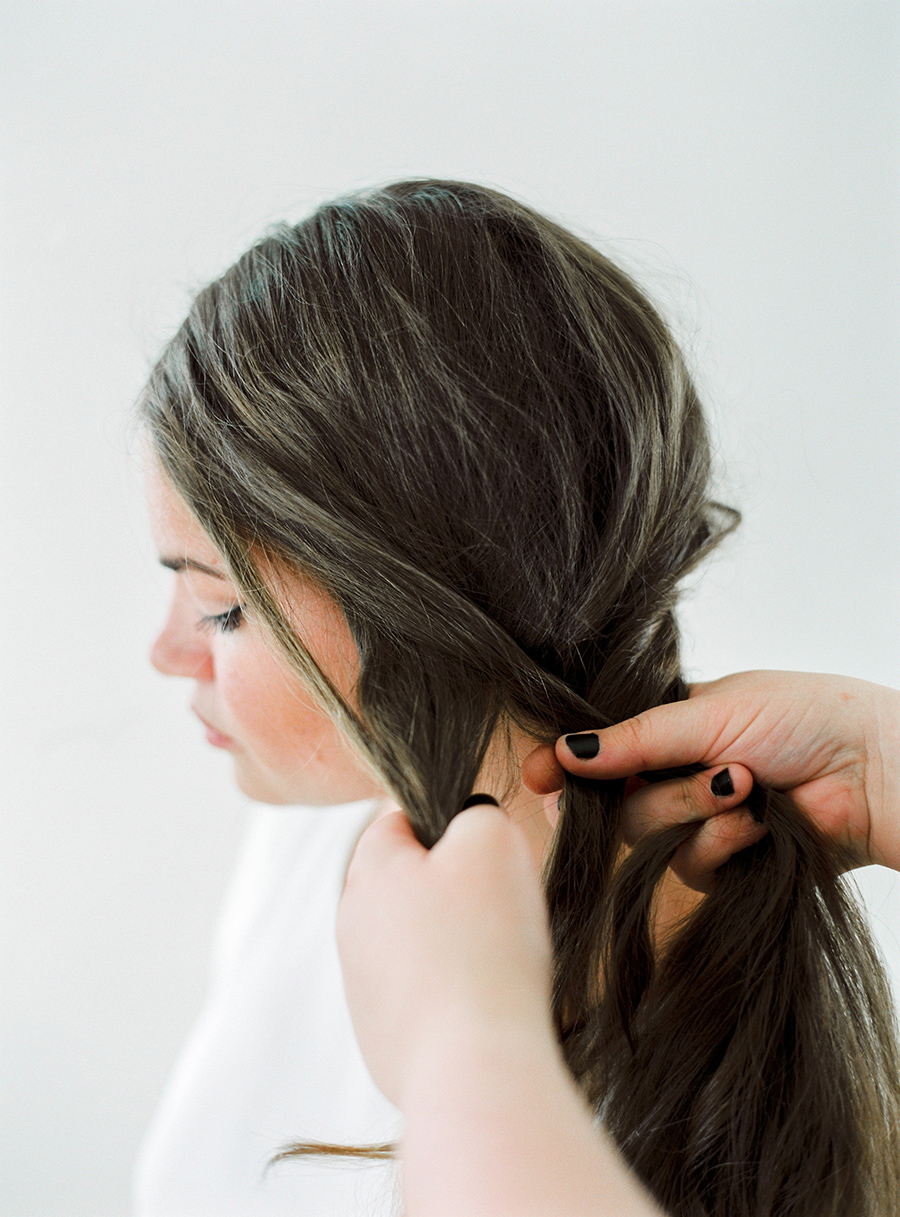
Keep going by taking small pieces from each side into the inside of each section. Save a piece un-braided at the end and tighten with a mini elastic hair band. Looks best with the transparent version or same color as your hair.
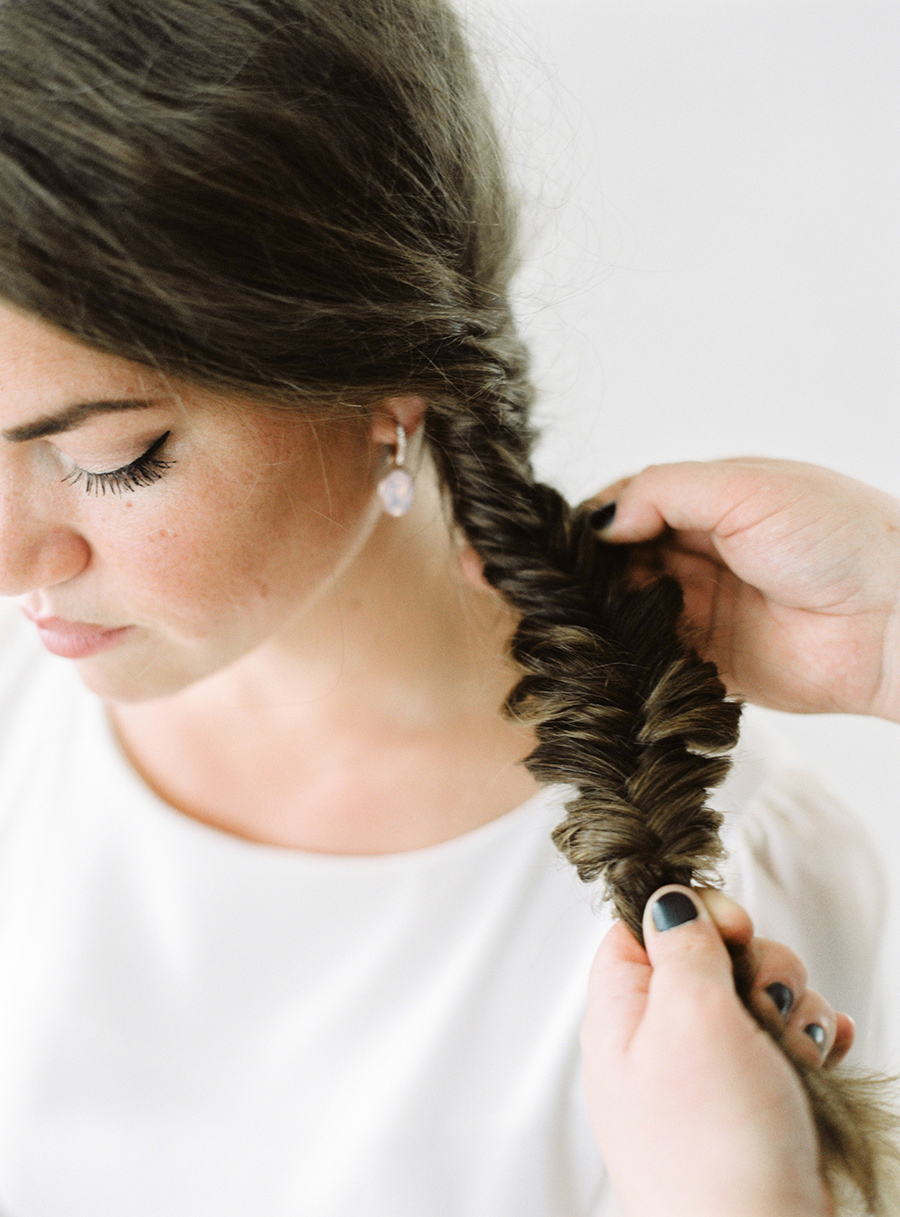
We love Blax Snag-Free that you can get for next to nothing at Lyko. Pull or some strands to roughen up the look and make it more bohemian and use some spray wax to keep in place. Voila, done! It takes some practice to make perfect but you’ll get the hang of it pretty fast. Great style for a wedding but also for any day at work or for going out.

Makeup: Alice Norheim // Styling: The Wild Rose // Model: Elin Wallmander


+ COMMENTS
ADD A COMMENT